

Lower Unit
Lubricate it right.
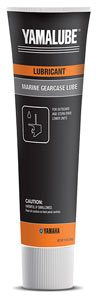
 The gears inside your lower unit are constantly turning, and the only protection they have is the lower unit lubricant you use. Its job is to form a micro-thin film between the metal component parts to keep them from actually touching. Under the large loads these gears exert, proper lubrication requires extreme resistance to pressure, foaming and molecular shear. And, since the lower unit operates underwater, its lubricant also has to be capable of maintaining necessary lubricity even when a significant amount of water is present, should some leak inside. Ordinary gear lubricant can’t do all of this; so always avoid automotive or tractor gear oils. Use a quality, marine-based formula, like Yamalube® Marine Gearcase Lube. It can perform all of these required protection and lubrication duties, even with a full 10% of water present. There’s even an HD formula, to meet the special needs of Yamaha’s top-of-the-line V MAX SHO®, 4.2L V6 Offshore and 5.3L F350 V8 outboard lower units.
Check it out.
 Visually inspect the exterior of your lower unit for any signs of damage every time before you go out. If you fish, it’s a good idea, every fifty hours or so (or when necessary whichever occurs first), to remove the propeller and check for any fishing line or other debris that may be wrapped around the propeller shaft, which can cut into prop shaft seals and potentially allow water to enter the gearcase. If found, visually inspect the propshaft seals for damage or leakage. Then check the color of your lower unit lubricant by cracking the “drain screw” on the bottom of the bullet and the “vent screw” on the side of the lower unit. Allow a small amount to drain into a clean container. If the lubricant is milky in color, you’ve got water in the lubricant. Have the lower unit seals inspected by your Yamaha Marine dealer through a pressure test, and if necessary, have the seals replaced. Pressure testing a lower unit is best performed by an authorized Yamaha Marine dealer, because depending on findings, it may be necessary to disassemble the lower unit for further inspection.
Tip: It’s best not to run the outboard right before checking the lower unit lubricant, as this will agitate the oil with whatever air is trapped inside. The resulting fine bubbles might be confused with the milky appearance that occurs with water ingestion.
Change it out.
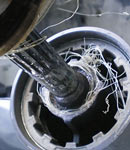
 Yamaha recommends replacing your lower unit lubricant after the first 20 hours for a new outboard, then every 100 hours after that. Also, if it’s milky in color or smells or looks burnt when you’re checking it, it’s time for a change. To do it yourself, place a pan under the bottom drain screw, remove the screw, and then remove the upper vent screw on the side of the lower unit. Allow all of the lubricant to drain into the pan. While you’re waiting, check the drain screw. It’s magnetic; so any metal particles or shavings present in the lubricant will be attracted to it. Fine metallic dust is normal, but if you find larger chips of metal on the screw or in the pan as the lubricant drains, have your local Yamaha Marine dealer check for possible internal damage. Also at this time, replace the small crush washer present on each screw (commonly known as “drain plug gaskets”). If you don’t see one, it may still be adhering to the outboard. Use a pick to pull it free, as these must be located, discarded, and replaced each time these screws are removed.
Tip: These drain screw crush washers serve as gaskets and are not reuseable. They are a main source of protection against water intrusion into the lower unit, which can cause catastrophic dilution of the lubricant. Do NOT try to save a few pennies here. Lower units are very expensive. It’s best to always have some extra drain plug gaskets on hand.
Once all the lube has drained, refill the lower unit by threading the appropriate fitting into the lower unit drain screw opening (on the bottom of the bullet) and slowly pumping in fresh Yamalube Marine Gearcase Lube or Lubricant HD. Once you see this new fluid seeping out of the upper vent screw hole, stop and wait 5 minutes, then very slowly continue pumping until it seeps from the vent screw again. At this point, replace the vent screw with a new crush washer installed, and tighten according to manufacturer specifications. Remove the fitting attached to the drain screw opening, and quickly re-install the drain screw with the new crush washer installed. Tighten to factory specifications.
You may choose to do these procedures yourself, or you can have your authorized Yamaha Marine dealer do them for you. Either way, performing them is important for proper continued operation and your continued satisfaction and enjoyment.
Tip: All the items in this catalog are available through your local authorized Yamaha Marine dealer. More information can be found at YamahaOutboards.com.
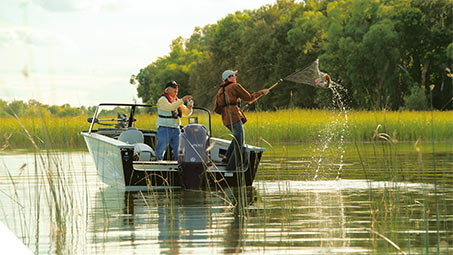
Steve Pennaz with tips on caring for your lower unit